Adding Annotations to Google map using JavaScript and Promises

I worked on the Uber coding challenge couple years back. The goal of project was given the name of a movie shot in the San Francisco, plot the locations on the map. Plus points were addition of few animations, providing users with autocompletion as they type in their queries etc.
Below is the outline of subtasks as a part of taking movie name as an input, getting movie locations as a response and mapping them on the Google Maps.
We will assume that we get the list of locations from the blackbox without going through the implementation or server request details
- Index page
First we will create a HTML home page to show Google map and related markers. Name it asindex.html. This will act as our front end UI
<head>
    <!DOCTYPE html>
    <meta charset="utf-8">
    <meta http-equiv="X-UA-Compatible" content="IE=edge">
    <title>Movie locations Marker - Supported by Google Maps</title>
    <!-- Main CSS file for design guideline details -->
    <link rel="stylesheet" href="css/main.css">

    <script src="https://cdnjs.cloudflare.com/ajax/libs/jquery/2.0.3/jquery.js"></script>
    <!-- Adding promise file to avoid problems in IE and Safari Browsers in which promise is not supported -->
    <!-- Source : https://github.com/then/promise -->
    <script src="https://www.promisejs.org/polyfills/promise-4.0.0.js"></script>
    <script src="js/APIRequestMovies/SFMoviesProjectConstants.js"></script>
    <script src="js/APIRequestMovies/SFMoviePromiseProvider.js"></script>

    <script type="text/javascript" src="https://maps.googleapis.com/maps/api/js?key=auth_key"></script>
    <script src="js/GoogleMaps/GoogleMapsFetch.js"></script>
    <script src="js/APIRequestMovies/SFMovieMapPlotterOnView.js"></script>
</head>
<body>
<div id="map-canvas"></div>
</body>
</html>
- Create a JavaScript file which will hold all the constants used in the project. Name it as
GoogleMapsProjectConstants.js
var GoolgeMapsBaseURL="https://maps.googleapis.com/maps/api/geocode/json";
var GoogleMapsAuthorizationKey="auth_key";
- We are using Promise.js to perform asynchrnous network requests. We will create a utility promise class to create and return promise from URL and parameters. Name it as
GoogleMapsPromiseProvider.js
//This is simple function to get promise for given URL and set of parameters
//We will simply use jQuery provided API to 'GET' data from specified endpoint

 function getPromiseWithURLAndParameters(destinationURL,getParameters){
    return new Promise(function(resolve, reject) {
        $.ajax({
            url: destinationURL,
            type: 'GET',
            dataType: 'json',
            data : getParameters,
            success: function(successResponse) {
                resolve(successResponse);
            },
            error: function(errorResponse) {
                reject(errorResponse);
            }
        });
    });
}
- Now customize the map with given options. This includes custom design and animation for marker as well as initializing map on the viewport. Name this file as
GoogleMapsInitializer.js
var mapOptions;
var map;
var currentMarkerIndex;
var markers = [];
var bounds;
var defaultZoomLevel=6;

var shape = {
    coords: [1, 1, 1, 20, 18, 20, 18, 1],
    type: 'poly'
};

function initialize() {
    bounds = new google.maps.LatLngBounds();
    mapOptions = {
        zoom: defaultZoomLevel
    };

    //Initialize new maps with initial options set
    map = new google.maps.Map(document.getElementById('map-canvas'),
        mapOptions);
}

function addMarkerOnMap() {

    //<mapCoordinatesAndInfoHolderArray> holds the specific location and specially all location details
    //We will separate it out and display on the view port

    var currentLocationToMarkOnMap = mapCoordinatesAndInfoHolderArray[currentMarkerIndex];

    //Convert retrieved Latitude and longitudes to Google Maps layLong Object

    var myLatLng = new google.maps.LatLng(currentLocationToMarkOnMap[1], currentLocationToMarkOnMap[2]);

    //Center the map at current coordinates. Map will readjust itself for each pin being plotted on the map

    map.setCenter(myLatLng);

    var image = {
        url: "../GoogleMapsDemo/images/location.png",
        size: new google.maps.Size(48, 48)
    };

    var marker = new google.maps.Marker({
        position: myLatLng,
        map: map,
        shape: shape,
        zIndex: currentLocationToMarkOnMap[3],
        icon: image

    });
    markers.push(marker);
    currentMarkerIndex++;
    bounds.extend(myLatLng);
    map.fitBounds(bounds);
}

function plotPinsOnMapWithGoogleMapsLocationsInformation() {
    currentMarkerIndex = 0;
    for (var i = 0; i < mapCoordinatesAndInfoHolderArray.length; i++) {
        addMarkerOnMap();
    }
    map.fitBounds(bounds);
}

//Beofre plotting new coordinates make sure we remove all markers from previous mappings
function deleteMarkers() {
    clearMarkers();
    markers = [];
}

function clearMarkers() {
    setAllMap(null);
}

function setAllMap(map) {
    for (var i = 0; i < markers.length; i++) {
        markers[i].setMap(map);
    }
}

google.maps.event.addDomListener(window, 'load', function() {
    initialize();
    sendRequestToGetListAndPlotAllMapPointOnMapWithGoogleMapsName();
});
- This is the last step in the demo to show annotations on the Google maps given the list of addresses. We will send the request in the form of promise, get latitude and longitude collection from server and plot them on the graph in terms of the map annotations
//We will use this array to store metadata for specific location. This information includes but is not limited to

var collectionOfAllGoogleMapsMetaData=[];

//Given each location, we will make request to Google geocoding API to get coordinates.
//We will use this array to hold all those co-ordinate value

var mapCoordinatesAndInfoHolderArray=[];


function sendRequestToGetListAndPlotAllMapPointOnMapWithGoogleMapsName(){

    console.log("Sending Request to server...");

    mapCoordinatesAndInfoHolderArray=[];
    //We may have markers from previous request. Before sending request, we will call this function to
    // get rid of all markers on the current map

    deleteMarkers();

    collectionOfAllGoogleMapsMetaData=["43068", "43201", "02125", "60290"];


    var individualGoogleMapLocationLocationFromDatabase='';

    if(collectionOfAllGoogleMapsMetaData.length>0){

        var promisesCollectionArray=[];

        //For each location we will have to make separate request to Google geo-coding API
        //We will take each URL and create an array of promises for each of this URL

        for(var locationsIndex in collectionOfAllGoogleMapsMetaData){

            //Encoding URL to avoid possible conflict with special character present in the address component such as &

            individualGoogleMapLocationLocationFromDatabase =encodeURIComponent(collectionOfAllGoogleMapsMetaData[locationsIndex]);
            promisesCollectionArray.push(getPromiseWithURLAndParameters(GoolgeMapsBaseURL+"?address="+individualGoogleMapLocationLocationFromDatabase+"&key="+GoogleMapsAuthorizationKey,[]));
        }


        Promise.all(promisesCollectionArray).then(function(returnedLocationCoordinates){

            //Execute this block only if promise has succeeded
            if(returnedLocationCoordinates)
            {
                $("#no-result-error").animate({top:'-44px'});
                for(var locationCoordinatesIndex in returnedLocationCoordinates){


                    if(returnedLocationCoordinates[locationCoordinatesIndex]['status']==='OK'){
                        var individualCoordinateDetail=returnedLocationCoordinates[locationCoordinatesIndex];
                        var locationName = individualCoordinateDetail['results'][0]['formatted_address'];
                        var locationDetails =  individualCoordinateDetail['results'][0]['geometry']['location'];

                        //We are storing it going by sequence - 'Description dictionary', latitude, longitude and z-index of specific pin
                        //Mapped on the given view
                        mapCoordinatesAndInfoHolderArray.push([collectionOfAllGoogleMapsMetaData[locationCoordinatesIndex],locationDetails['lat'],locationDetails['lng'],parseInt(locationCoordinatesIndex+5,10),locationName]);

                    }
                    else{
                        //Somewhere down the line we enountered an error while retrieving Geolocation using Google's
                        //Geocoding APIs. Log this error. In our case, if one prmise fails, it will cause collapse for
                        //All subsequent one and control will eventually reach here

                        console.log("Error In retrieving location with details  "+JSON.stringify(collectionOfAllGoogleMapsMetaData[locationCoordinatesIndex]));
                    }
                }
                //Now we have all information tooltip metadata and coordinates - Send all this data to create a beautiful graphics on the map
                if(mapCoordinatesAndInfoHolderArray.length>0){
                    plotPinsOnMapWithGoogleMapsLocationsInformation();
                }

            }
            else{
                $("#no-result-error").animate({top:'0'});
            }
        },function(error){
            console.log("Error occurred in retrieving geo locaiton using Google's Geocoding APIs. Error description is : "+error);
        });;
    }
    else{
        console.log("no Locations info found for given input location name");
        return 0;
    }
}
Please note that we have used the custom local image as a map marker with property
icon. If it's local image, you can specify the absolute or relative path of the image. It it's remote, you can simply specify the URL to an image. As a bonus, you can modify the code to include bounce animation when one of the markers is clicked
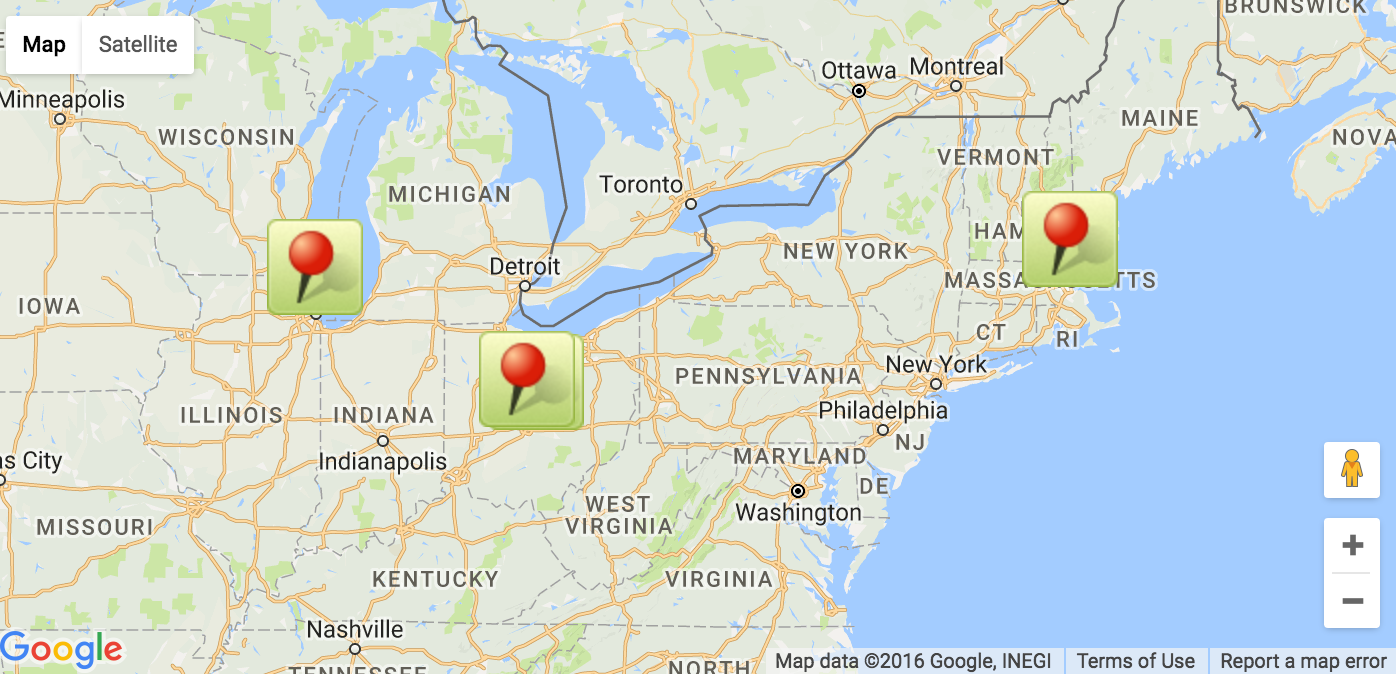
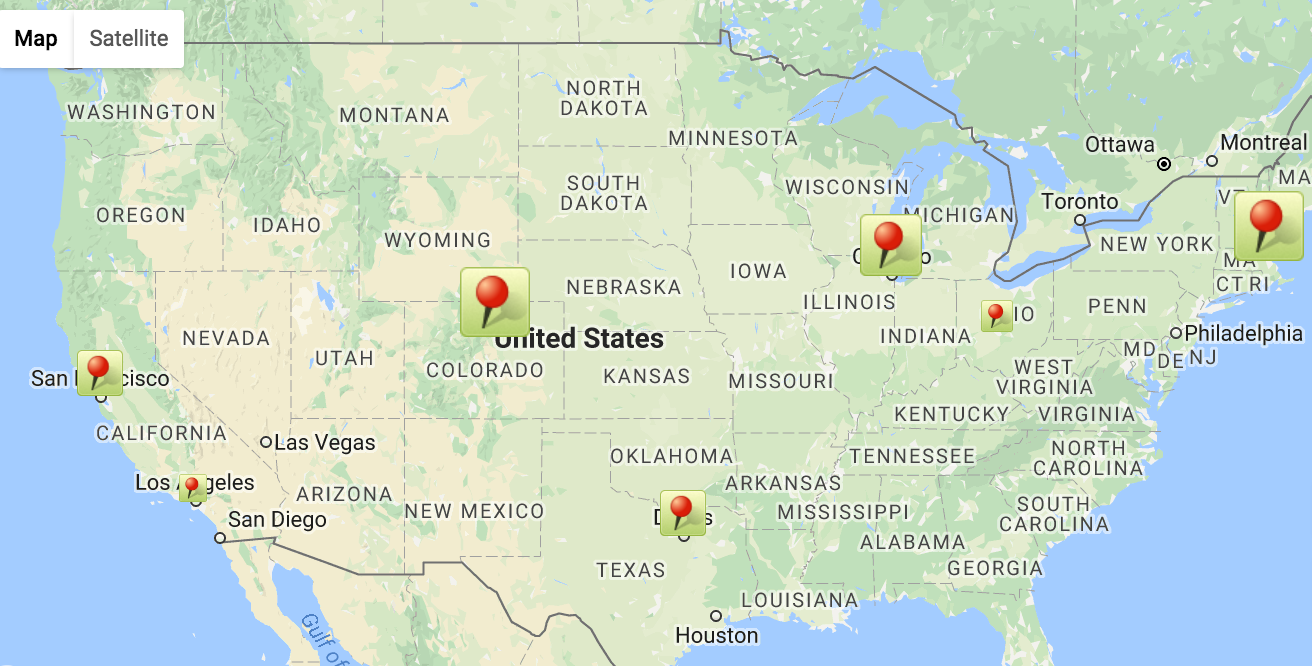
I have chosen total 4 zip codes to plot on the map. (2 in Ohio, 1 in Illinois and 1 in Boston). Below is the final result of these efforts,
Note that I have used a custom image for marker. If you want a native icon, simple take off the
iconproperty from themarkerobject
Update: (08/26/2016)
Below are the updates I added to this demo as project progressed.
- Adding custom marker images and adding custom scaled size to marker images
You can add custom images for marker in place of a classic location markers as follows:
Supposelocation.pngis the name of custom image you want to add.var pinSize = 32; var image = { url: "[BASE_FOLDER]/GoogleMapsDemo/images/location.png", scaledSize: new google.maps.Size(pinSize, pinSize) };
// Now initialize map marker with this custom image as follows:
var myLatLng = new google.maps.LatLng(34.56, -89.34);
var map = new google.maps.Map(document.getElementById('map-canvas'),
mapOptions);
var marker = new google.maps.Marker({
position: myLatLng,
map: map,
icon: image
});
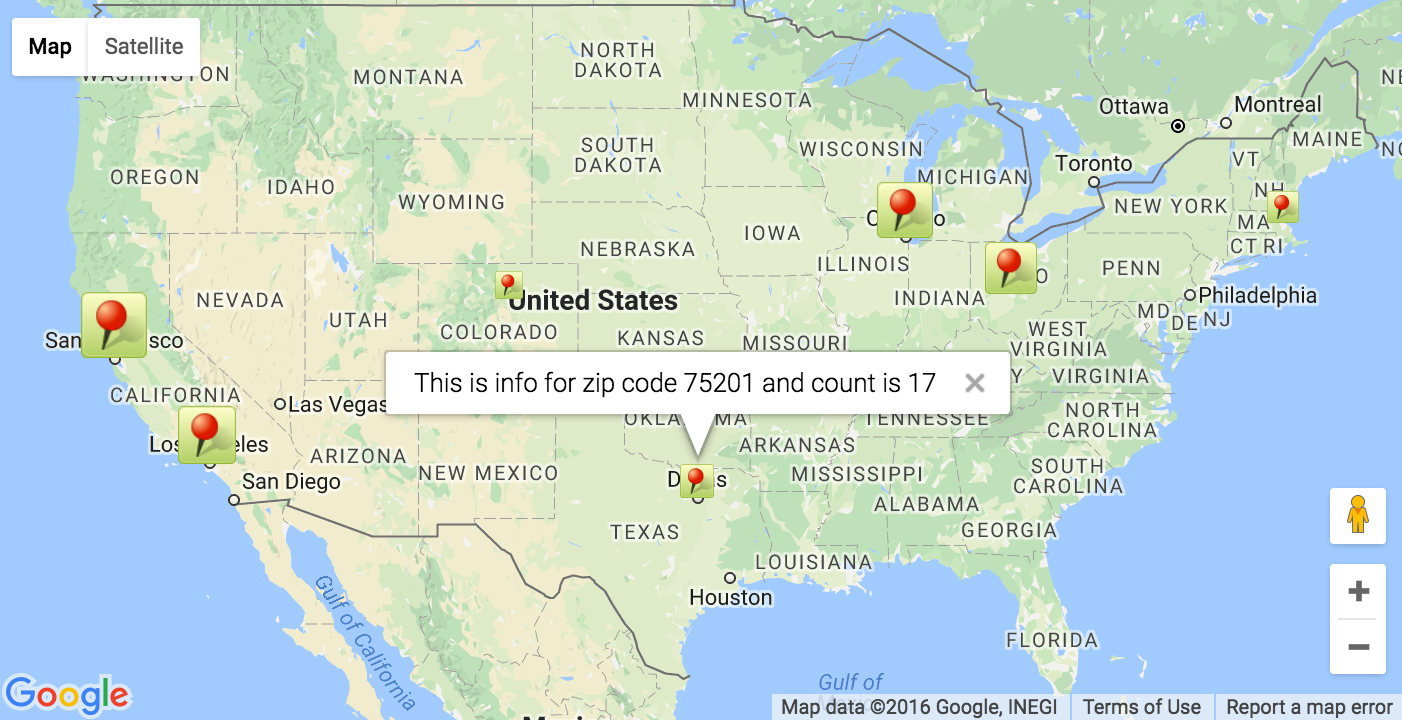
You can customize the marker size. For e.g. say, you want to show map markers for number of users for given zip code. You can map number of users to the size of marker to graphically represent this count.
- Show tooltips with detailed information
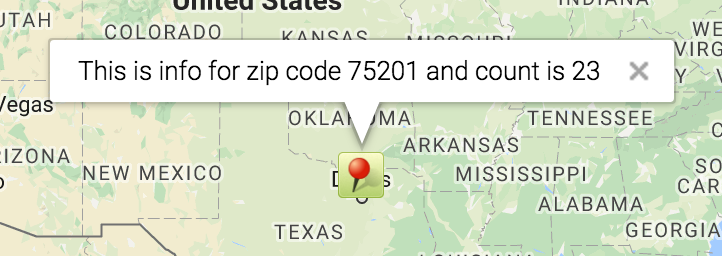
Sometimes showing tooltips is not enough. When user clicks it, we might want to show extra information. In our example we will show zip code and number of users associated with given tooltip.
var infoWindow = new google.maps.InfoWindow({
        content: contentString
    });
marker.addListener('click', function() {
        infowindow.open(map, marker);
  });
-
Open one tooltip at a time
According to Google guidelines, having multiple infowindows will clutter the UI and overwhelm user with unnecessary information. Thanks to this StackOverflow post, you can now show only one infowindow open amidst multiple map markers.
// Create one global infoWindow object at the top and for every marker click, close the previous infoWindow if one exists
var selectedInfoWindow;
// Other map initialization code.
marker.addListener('click', function() {
if (selectedInfoWindow != null && selectedInfoWindow.getMap() != null) {
selectedInfoWindow.close();
if (selectedInfoWindow == infoWindow) {
selectedInfoWindow = null;
return;
}
}
selectedInfoWindow = infoWindow;
selectedInfoWindow.open(map, marker);
});
This should be it as long as basic usage of Google maps in web projects is concerned. You can find more information on Official Google maps documentation page. Feel free to message me or put comments to this post if you have any further questions.
I hope this will help in your own Web Project.The original project is hosted on GitHub. You can also play with the original demo

