SwiftUI - Attributed Strings Improvements in iOS 15


Before iOS 15, attributed strings were indirectly supported by SwiftUI. If you wanted to apply attributes to string pre-iOS 15, you would do something like this,
Text("I have ")
    .fontWeight(.bold) +

Text("two pairs ")
    .underline() +

Text("of apples")
    .foregroundColor(Color.red)

However, as you might have correctly guessed, it doesn't really go well with localizations where localized strings may change the order of attributed substrings. We needed a better solution, and iOS 15 fixes precisely that problem.
Meet AttributedString struct in iOS 15
AttributedString was introduced in iOS 15. Being a struct it's a value type and is compatible with string type and also supports the localization so that we can translate attributed strings into any target language without losing the original context.
Let's understand this new construct works with basic examples.
We can apply any attributes to a string after converting it into AttributedString instance. We can easily perform the conversion with a simple initializer that takes a String type parameters.
let welcomeString = "Welcome"

var welcomeAttributedString = AttributedString(welcomeString)
After converting it into AttributedString instance, we can apply arbitrary attributes to it.
let welcomeString = "Welcome"
var welcomeAttributedString = AttributedString(welcomeString)
welcomeAttributedString.font = .body.bold()
welcomeAttributedString.foregroundColor = .yellow
welcomeAttributedString.backgroundColor = .red

....
..

var body: some View {
    Text(welcomeAttributedString)
}
This isn't limited to just one string. We can create any number of attributed strings, apply attributes to them and show them at once by concatenating them.
let welcomeString = "Welcome"
var welcomeAttributedString = AttributedString(welcomeString)
welcomeAttributedString.font = .body.bold()
welcomeAttributedString.foregroundColor = .yellow
welcomeAttributedString.backgroundColor = .red

var house = AttributedString(" to our new house\n")
house.font = .body
house.foregroundColor = .red

var website = AttributedString("Please visit the website of our house ")
website.font = .body.italic()
website.link = .init(string: "https://www.google.com")
website.backgroundColor = .lightGray

....
..


var body: some View {
    Text(welcomeAttributedString + house + website)
}
Understanding the role of AttributeContainer
SwiftUI provides another convenient container in iOS 15 in the form of AttributeContainer. It allows us to apply the same styles to multiple attributed strings without duplication.
We create AttributeContainer using AttributeContainer() initializer and call mergeAttributes on the attributed string instance to merge the string's attributes with those applied to the container.
Referring to the above example, we will apply the same styles to two attributed strings using the container. We will attach the same background color and font to the last two strings.
First, we will create a container, add background color and font attributes, and then merge house and website strings attributes with this container.
var container = AttributeContainer()

container.backgroundColor = .green
container.font = .largeTitle.bold()

house.mergeAttributes(container)
website.mergeAttributes(container)

Containers are power tools which allow us to reuse existing styles to multiple attributed strings without repetition. It's possible to create container utilities which can be used throughout the app and can be changed just once when the app undergoes rebranding!
AttributedString Views
iOS 15 adds another important concept of AttributedString views. These views provide access to two important characteristics of attributed strings. We will learn them in depth in the following sections. Views can be considered as the introspection tool where they allow us to analyze the internals of attributed strings.
Characters
Character views provide access to string characters. By accessing individual or multiple characters, we can directly apply styles to them.
Characters are represented by an array of characters. Referring to the above examples, let's iterate over individual characters of welcome attributed string.
for character in welcomeAttributedString.characters {

}
Once we have access to characters and their indices, we can directly mutate their attributes. For example, changing attributes of specific characters.
let welcomeAttributeCharacters = welcomeAttributedString.characters

for index in welcomeAttributeCharacters.indices where welcomeAttributeCharacters[index] == "e" {

    welcomeAttributedString[index..<welcomeAttributeCharacters.index(after: index)].foregroundColor = .black

    welcomeAttributedString[index..<welcomeAttributeCharacters.index(after: index)].font = .body.bold()
}
Or even alternatively changing the color of characters,
let welcomeAttributeCharacters = welcomeAttributedString.characters

var iterationIndex = 0

for index in welcomeAttributeCharacters.indices {

    let foregroundColor: Color

    if iterationIndex % 2 == 0 {
        foregroundColor = .white
    } else {
        foregroundColor = .black
    }

    welcomeAttributedString[index..<welcomeAttributeCharacters.index(after: index)].foregroundColor = foregroundColor

    iterationIndex += 1
}

Runs
Runs perform the exactly opposite operations to that characters. While characters provide access to string characters, runs provide access to string attributes with their ranges.
Run is a starting location, name, and value of the particular attribute. Once we have run, we can get the string associated with it. The number of runs is equivalent to the count of all ranges in the given string to which attributes have been applied. Run will have multiple attribute values if multiple attributes are applied to that particular string range.
Let's take a look at it with the following example,
let welcomeString = "Welcome"

var welcomeAttributedString = AttributedString(welcomeString)
welcomeAttributedString.font = .body.bold()
welcomeAttributedString.foregroundColor = .yellow
welcomeAttributedString.backgroundColor = .red

var house = AttributedString(" to our new house\n")
house.font = .body
house.foregroundColor = .red

let finalMessage = welcomeAttributedString + house

print(finalMessage.runs.count) // Prints 2
In the above example, since we applied attributes to only two ranges in the finalMessage, the number of runs is only 2.
Since runs are just a regular collection, we can iterate over them using indices.
for index in finalMessage.runs.indices {

}
Accessing the string associated with each run
Since run store the range to which attributes are applied, we can reverse engineer and get the string to which attribute is applied using the range property on run.
let firstRun = finalMessage.runs.first!

let stringWithFirstRun = String(finalMessage.characters[firstRun.range]) // Prints "Welcome"

let lastRun = finalMessage.runs.last!

let stringWithLastRun = String(finalMessage.characters[lastRun.range]) // Prints " to our new house\n"
Accessing specific attributes of run
If we want to access only specific run attributes, we can specify so with a keypath. For example,
// Gets all the link attributes
let linkRunCount = finalMessage.runs[\.link].count // Prints 1

// Gets all the foregroundColor attributes
let foregroundColorRunCount = finalMessage.runs[\.foregroundColor].count // Prints 2

// Gets all the backgroundColor attributes
let backgroundColorRunCount = finalMessage.runs[\.backgroundColor].count // Prints 2
Once we have a collection of attributes, we can iterate over them like a regular array accessing its value and range.
for (value, range) in finalMessage.runs[\.link] {
    if let v = value {
        print(v.scheme)
    }
}
Changing Attributes by Substring Value
With the new API, it's also possible to change the attributes of the specific substring. Once we know what substring we want to apply attributes to, we can extra its range and apply new attributes only to that subrange.
In the above example, we can apply a specific style to only the "house" substring with the following code,
if let houseRange = finalMessage.range(of: "house") {
    message[houseRange].foregroundColor = .cyan
    message[houseRange].font = .caption.bold()
    message.characters.replaceSubrange(houseRange, with: "Apartment ")
}

Or even underlining a specific parts of the source string,
if let newHouseRange = finalMessage.range(of: "new house") {
    finalMessage[newHouseRange].baselineOffset = 4
    finalMessage[newHouseRange].kern = 2
    finalMessage[newHouseRange].underlineStyle = Text.LineStyle(pattern: .solid, color: .pink)
}


Bridging with Native NSAttributedString Class
In spite of new APIs, it's possible that your app may be using legacy NSAttributedString class. It is still possible to use new AttributedString and convert it into NSAttributedString class using the following one-liner.
// AttributedString struct
var sampleAttributedString = AttributedString("Sample")

// NSAttributedString class
let nsAttributedString = NSAttributedString(sampleAttributedString)
Dates and Attributed Strings
Support of attributed strings is not limited to plain strings. With new APIs, we can also highlight specific parts of the string representing the date. For example week, month, or year in date with each having its own attribute set.
Consider the following example where we have a requirement to apply different styles to weekday, month, and year for the given date string.
First, we will create an instance of String object from Date. Then, we will create an attribute container with the name of the date field to which the attribute should be applied. Then, we will replace the attribute for the date substring with the one we just created.
import SwiftUI

struct MyAttributedDateStrings: View {

    @State var date = Date.now
    @Environment(\.locale)
    var locale

    var formattedDateString: AttributedString {

        var dateString = date
            .formatted(
                .dateTime
                .minute()
                .hour()
                .weekday()
                .month()
                .year()
                .locale(locale)
                .attributed
            )
        let weekdayAttributeContainer = AttributeContainer.dateField(.weekday)

        let monthAttributeContainer = AttributeContainer.dateField(.month)

        let yearAttributeContainer = AttributeContainer.dateField(.year)

        let redColor = AttributeContainer.foregroundColor(.red)
        let greenColor = AttributeContainer.foregroundColor(.green)
        let orangeColor = AttributeContainer.foregroundColor(.orange)

        dateString.replaceAttributes(weekdayAttributeContainer, with: redColor)
        dateString.replaceAttributes(monthAttributeContainer, with: greenColor)
        dateString.replaceAttributes(yearAttributeContainer, with: orangeColor)

        return dateString
    }

    var body: some View {
        VStack {
            Text("Today's Date")
            Text(formattedDateString)
        }
        .multilineTextAlignment(.center)
    }
}

// A demo for preview

struct MyAttributedDateStrings_Previews: PreviewProvider {
    static var previews: some View {
        MyAttributedDateStrings().environment(\.locale, Locale(identifier: "en_US"))
    }
}

Please note that we are also manually passing locale to MyAttributedDateStrings through environment properties. If no locale value is passed, iOS will use the default locale provided by the systemMarkdown Support
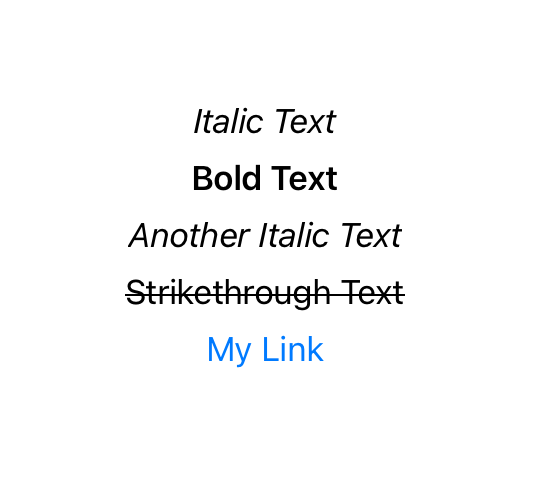
In addition to new APIs in previous sections, SwiftUI has added markdown support in iOS 15. You can now add any text with markdown styling and it will get correctly rendered in the app.
var body: some View {
    VStack(spacing: 8) {
        Text("_Italic Text_")
        Text("**Bold Text**")
        Text("*Another Italic Text*")
        Text("~Strikethrough Text~")
        Text("[My Link](www.google.com)")
    }
}
Creating Encoding and Decoding of Custom Attributes for Strings (Using JSON 5 or Markdown)
Another fancy feature of iOS 15 is that it marries markdown with custom attribute styles defined in Swift. It is as good as it sounds. You can define custom styles in the app and have the server send a markdown specifying which styles it wants to apply to specific parts of the string.
Since this topic is too big on its own, I decided to dedicate its own blog post. The post on decoding custom string attributes via markdown language is available on this link.
Summary
So this was all about new attributed strings APIs in iOS 15. Personally, I loved these new additions. In addition to expressiveness, they also make it convenient to add localizations on top of it. Although I am excited about them, I still can't add them to the project since our minimum deployment target is still iOS 13. However, that doesn't prevent us from experimenting with it and learning hidden nuances.
Have you already played with these new APIs? How was your experience? Do you have any comments on their usage and ease of use? I would love to hear from you. For suggestions and feedback, please reach out at @jayeshkawli.
References