Core Data Migration - Part 2 (Removing Attributes)

Disclaimer: I have taken a code example to show how to migrate data from Migrating a data model with Core data. So if you are interested in learning more about core data, please read on the original post
In the last post of core data migration series we saw how adding new field in the core data model does not necessitate versioning of core data models. In this post we are going to see how removing existing fields can be handled.
There are following steps for this process after modifying underlying core data model.
- Use
NSPersistentStoreCoordinatorinstance to perform data migration from older to newer version
//
//  CoreDataManager.swift
//  Lists
//
//  Created by Bart Jacobs on 07/03/2017.
//  Copyright © 2017 Cocoacasts. All rights reserved.
//

import CoreData

final class CoreDataManager {

    // MARK: - Properties

    private let modelName: String

    // MARK: - Initialization

    init(modelName: String) {
        self.modelName = modelName
    }

    // MARK: - Core Data Stack

    private(set) lazy var managedObjectContext: NSManagedObjectContext = {
        let managedObjectContext = NSManagedObjectContext(concurrencyType: .mainQueueConcurrencyType)

        managedObjectContext.persistentStoreCoordinator = self.persistentStoreCoordinator

        return managedObjectContext
    }()

    private lazy var managedObjectModel: NSManagedObjectModel = {
        guard let modelURL = Bundle.main.url(forResource: self.modelName, withExtension: "momd") else {
            fatalError("Unable to Find Data Model")
        }

        guard let managedObjectModel = NSManagedObjectModel(contentsOf: modelURL) else {
            fatalError("Unable to Load Data Model")
        }

        return managedObjectModel
    }()

    private lazy var persistentStoreCoordinator: NSPersistentStoreCoordinator = {
        let persistentStoreCoordinator = NSPersistentStoreCoordinator(managedObjectModel: self.managedObjectModel)

        let fileManager = FileManager.default
        let storeName = "\(self.modelName).sqlite"

        let documentsDirectoryURL = fileManager.urls(for: .documentDirectory, in: .userDomainMask)[0]

        let persistentStoreURL = documentsDirectoryURL.appendingPathComponent(storeName)

        do {
            let options = [ NSInferMappingModelAutomaticallyOption : true,
                            NSMigratePersistentStoresAutomaticallyOption : true]

            try persistentStoreCoordinator.addPersistentStore(ofType: NSSQLiteStoreType,
                                                              configurationName: nil,
                                                              at: persistentStoreURL,
                                                              options: options)
        } catch {
            fatalError("Unable to Load Persistent Store")
        }

        return persistentStoreCoordinator
    }()

}
The main part in above model is from line 46 to 69. Every time we try to add persistentStore to the persistentStoreCoordinator, it checks if data migration needs to be done. If you have changed the model and forgot to update with new version, app will crash with an exception.
As specified on the line 20, we initialize the CoreDataManager with the model name. This is same as the name of you .xcdatamodelId file.
In this case we initialize CoreDataManager as follows,
let coreDataManager = CoreDataManager(modelName: "Products")
And this is the code to create and fetch entities from underlying data model. Both methods take entity name as an input parameter and create or return corresponding entity objects. In this case we are going to use Product model, so we will pass Product as an entity name for both these methods.
//Ref: https://cocoacasts.com/migrating-a-data-model-with-core-data
// MARK: - Helper Methods

private func createRecordForEntity(_ entity: String, inManagedObjectContext managedObjectContext: NSManagedObjectContext) -> NSManagedObject? {
    // Helpers
    var result: NSManagedObject?

    // Create Entity Description
    let entityDescription = NSEntityDescription.entity(forEntityName: entity, in: managedObjectContext)

    if let entityDescription = entityDescription {
        // Create Managed Object
        result = NSManagedObject(entity: entityDescription, insertInto: managedObjectContext)
    }

    return result
}

private func fetchRecordsForEntity(_ entity: String, inManagedObjectContext managedObjectContext: NSManagedObjectContext) -> [NSManagedObject] {
    // Create Fetch Request
    let fetchRequest = NSFetchRequest(entityName: entity)

    // Helpers
    var result = [NSManagedObject]()

    do {
        // Execute Fetch Request
        let records = try managedObjectContext.fetch(fetchRequest)

        if let records = records as? [NSManagedObject] {
            result = records
        }

    } catch {
        print("Unable to fetch managed objects for entity \(entity).")
    }

    return result
}
To verify the working of our model, below are the couple of examples of Swift code to save and fetch records from the core data
// Saving into Core Data
if let product = createRecordForEntity("Product", inManagedObjectContext: managedObjectContext) as? Product {
    product.name = "Pro"
    product.price = 100.0
    product.type = "Merchandise"
}


do {
    // Save Managed Object Context
    try managedObjectContext.save()

} catch {
    print("Unable to save managed object context.")
}

// Fetching from Core Data
let managedObjectContext = coreDataManager.managedObjectContext

// Seed Persistent Store
seedPersistentStoreWithManagedObjectContext(managedObjectContext)

// Create Fetch Request
let fetchRequest = NSFetchRequest(entityName: "Product")

// Add Sort Descriptor
let sortDescriptor = NSSortDescriptor(key: "name", ascending: true)
fetchRequest.sortDescriptors = [sortDescriptor]

do {
    let records = try managedObjectContext.fetch(fetchRequest) as! [Product]

    for record in records {
        print(record.name ?? "No Name")
        print(record.price)
        print(record.type ?? "No Type")
    }
} catch {
    print(error)
}
Initially when we have fresh data model, it will save single record in database and print it out. Below is the output when app is run for the first time
Product succesfully saved in the database
Successfully retrieved records from the database
Pro
100.0
Merchandise
Now suppose you don't need the field type anymore. You can simply remove it from Product model and re-run the app. Now model will look like this
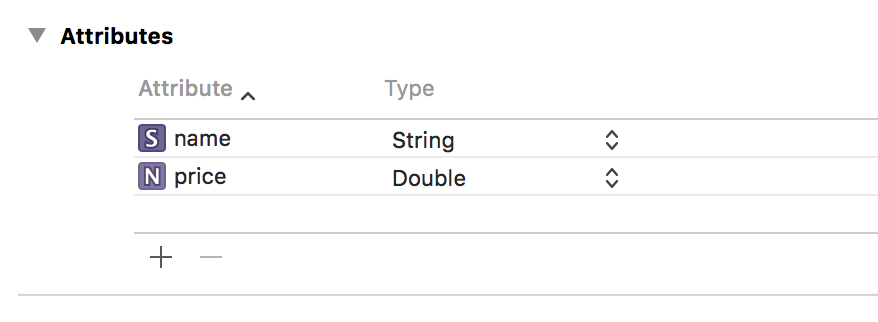
Having type removed, core data object models will be updated as well. In which case you don't want to print type any more. So newer model will print the following output
Product succesfully saved in the database
Successfully retrieved records from the database
Pro
100.0
Please note that how we removed one of the field and given the migration code, app will work just fine. This will work in following cases too, since we already provide lightweight migration.
If you want to perform migration similar to one of the following four use cases you can use the existing code. The kind of migration this code provides is called lightweight migration because it does not involve changing the data types of existing fields
1. Adding new field
2. Removing existing field
3. Adding new entities
4. Including new relationships
Please note that this blog post only talks about lightweight core data migration where it covers one of these cases mentioned above. I will be writing another post on heavy weight core data migration which will be useful when you want to change the type of one of the existing attributes in the core data model
Caveat:
Please make sure to perform incremental migrations. That is if you have 3 models where 1 is the oldest and 3 is the newest, an ideal way to achieve this migration is to go from model 1 to model 2 and then from model 2 to model 3. This approach ensures deterministic order is followed going from oldest to newest version and avoid uncountable permutations when there are modest number of versions in the app
Reference:
Migrating a data model with Core data
Core data heavy weight migration
Core data migration

