How to create a native iOS WebSocket client and connect it to the server


In the last post, we saw how to create a web socket server using NWConnection. In this post, we will complete that article by learning how to create an equivalent client which can talk to this server on the specified port.
As mentioned in my other article, we will use URLSessionWebSocketTask to create a connection on the client-side.
The full source code for Swift client and server is already on Github
Creating a new target for the client
Referencing an earlier article on creating server using NWConnection, we will add a client on top of it by creating a new target under the same project. Create a new target named SwiftWebSocketClient and add a new file SwiftWebSocketClient.swift under target.
Setting up UI
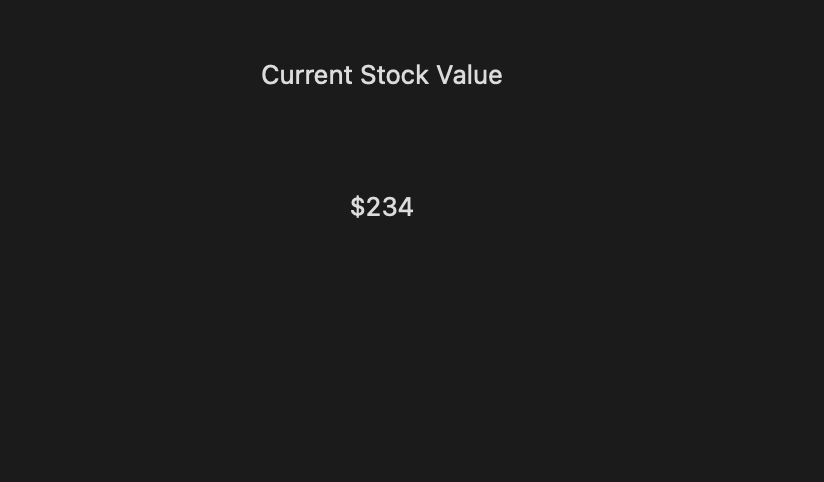
In order to make things more interesting, we will also add a tiny UI to our Mac app, which is just a label with a title and another label to indicate dummy stock prices in real-time.
Opening a web socket connection
In order to make network service easily accessible to all parts of the app, we will make a singleton object of SwiftWebSocketClient class. In order to prevent the client from opening the connection multiple times, we will use a file-level boolean flag which will indicate whether a connection has been opened or not.
As the client opens and closes the connection, our class needs to keep track of these activities. In order to do that, we will declare SwiftWebSocketClient as a delegate of type URLSessionWebSocketDelegate so that it can receive a callback as the connection is opened and closed.
Since we're assuming the web socket is running on local port 8080, we will use ws://localhost:8080 as a base web socket URL.
import Foundation

final class SwiftWebSocketClient: NSObject {

    static let shared = SwiftWebSocketClient()
    var webSocket: URLSessionWebSocketTask?

    var opened = false

    private var urlString = "ws://localhost:8080"

    private override init() {
        // no-op
    }

    func subscribeToService(with completion: (String) -> Void) {
        if !opened {
            openWebSocket()
        }
    }

    private func openWebSocket() {
        if let url = URL(string: urlString) {
            let request = URLRequest(url: url)
            let session = URLSession(configuration: .default, delegate: self, delegateQueue: nil)
            let webSocket = session.webSocketTask(with: request)
            self.webSocket = webSocket
            self.opened = true
            self.webSocket?.resume()
        } else {
            webSocket = nil
        }
    }
}

extension SwiftWebSocketClient: URLSessionWebSocketDelegate {
    func urlSession(_ session: URLSession, webSocketTask: URLSessionWebSocketTask, didOpenWithProtocol protocol: String?) {
        opened = true
    }


    func urlSession(_ session: URLSession, webSocketTask: URLSessionWebSocketTask, didCloseWith closeCode: URLSessionWebSocketTask.CloseCode, reason: Data?) {
        self.webSocket = nil
        self.opened = false
    }
}
subscribeToService is going to be our entry point into the web socket. Please note how we also provide a completion callback. This callback will be called with a string value of the stock quotes received from the server.
Setting up a callback to receive values from the server
The next thing we need to do is to set up a socket callback to receive values from the server through receive method URLSessionWebSocketTask instance.
We will set it up once in subscribeToService method, but due to its quirkiness, that is not enough. We need to set up a callback every time after it receives a server response on this callback.
func subscribeToService(with completion: @escaping (String?) -> Void) {
    if !opened {
        openWebSocket()
    }

    guard let webSocket = webSocket else {
        completion(nil)
        return
    }

    webSocket.receive(completionHandler: { [weak self] result in

        guard let self = self else { return }

        switch result {
        case .failure:
            completion(nil)
        case .success(let webSocketTaskMessage):
            switch webSocketTaskMessage {
            case .string:
                completion(nil)
            case .data(let data):
                self.subscribeToService(with: completion)
            default:
                fatalError("Failed. Received unknown data format. Expected String")
            }
        }
    })
}
As you can see in the above implementation, the receive method sends the result of the type Result<URLSessionWebSocketTask.Message, Error>. Further, in success case, we parse the URLSessionWebSocketTask.Message for possible cases such as string, Data or a default type. Since in this case we only expect data in Data format, we ignore data sent in other forms.
Please note how we're calling subscribeToService not just once but every time after this method receives a callback from the server and the result contains values of type URLSessionWebSocketTask.Message.Data.
Processing Received Data
Now that our callback is set, we will start adding logic to process received data from the server. Below is a brief overview of this flow,
- The client opens the connection with the server on a specified port
- The server sends a callback in
receivemethod with payload,["t": "connect.connected"] - The client recognizes it as an acknowledgment that connection has been established
- The client sends another payload
["subscribeTo": "trading.product.100"]which represents the product id to which the client wishes to subscribe - The server sees this message as an indication that the client wants to subscribe to stock quotes
- The server adds that client to its registered clients array, sends acknowledge signal to the client and the first value of trading quote in the form
["body": ["securityId": 100, "currentPrice": "100"]] - The acknowledgment signal received on the client-side contains an id that uniquely identifies the current connection. The client will store it for the duration of connection and when it wants to disconnect, it will make a request with this id which will then be used to remove that client from the server's list
- The client receives that trading quote value decodes it, and gets the value of the current stock price
- The client calls the completion handler with this value which in turn passes it over to UI and shows in our app
Let's code this flow together to see how it works,
webSocket.receive(completionHandler: { [weak self] result in

    guard let self = self else { return }

    switch result {
    case .failure:
        completion(nil)
    case .success(let webSocketTaskMessage):
        switch webSocketTaskMessage {
        case .string:
            completion(nil)
        case .data(let data):
            if let messageType = self.getMessageType(from: data) {
                switch(messageType) {
                case .connected:
                    self.subscribeToServer(completion: completion)
                case .failed:
                    self.opened = false
                    completion(nil)
                case .tradingQuote:
                    if let currentQuote = self.getCurrentQuoteResponseData(from: data) {
                        completion(currentQuote.body.currentPrice)
                    } else {
                        completion(nil)
                    }
                case .connectionAck:
                    let ack = try! JSONDecoder().decode(ConnectionAck.self, from: data)
                    self.connectionId = ack.connectionId
                }
            }

            self.subscribeToService(with: completion)
        default:
            fatalError("Failed. Received unknown data format. Expected String")
        }
    }
})

// Utility Methods

func getMessageType(from jsonData: Data) -> MessageType? {
    if let messageType = (try? JSONDecoder().decode(GenericSocketResponse.self, from: jsonData))?.t {
        return MessageType(rawValue: messageType)
    }
    return nil
}

func getCurrentQuoteResponseData(from jsonData: Data) -> SocketQuoteResponse? {
    do {
        return try JSONDecoder().decode(SocketQuoteResponse.self, from: jsonData)
    } catch {
        return nil
    }
}

func subscriptionPayload(for productID: String) -> String? {
    let payload = ["subscribeTo": "trading.product.\(productID)"]
    if let jsonData = try? JSONSerialization.data(withJSONObject: payload, options: []) {
        return String(data: jsonData, encoding: .utf8)
    }
    return nil
}

private func subscribeToServer(completion: @escaping (String?) -> Void) {

    guard let webSocket = webSocket else {
        return
    }

    if let subscriptionPayload = self.subscriptionPayload(for: "100") {
        webSocket.send(URLSessionWebSocketTask.Message.string(subscriptionPayload)) { error in
            if let error = error {
                print("Failed with Error \(error.localizedDescription)")
            }
        }
    } else {
        completion(nil)
    }
}
And here are all the local Models and Enums we used in the above code,
struct SocketQuoteResponse: Decodable {
    let t: String
    let body: QuoteResponseBody
}

struct QuoteResponseBody: Decodable {
    let securityId: String
    let currentPrice: String
}

struct ConnectionAck: Decodable {
    let t: String
    let connectionId: Int
}

struct GenericSocketResponse: Decodable {
    let t: String
}

enum MessageType: String {
    case connected = "connect.connected"
    case failed =  "connect.failed"
    case tradingQuote = "trading.quote"
    case connectionAck = "connect.ack"
}
Closing the connection
When the client no longer wants to receive these values or is navigating away from the screen showing these values, we can safely close the connection. To close the socket, we will call cancel on webSocket, set it to nil and update our flags to indicate the connection is no longer in progress.
func closeSocket() {
    webSocket?.cancel(with: .goingAway, reason: nil)
    opened = false
    webSocket = nil
}
Setting up the UI
Now that everything is set up, let's finally set up our UI to use SwiftWebSocketClient a singleton to establish the connection and start getting live mock stock values through the established interface.
The following code goes inside ViewController.swift
class ViewController: NSViewController {

    @IBOutlet weak var stockValueLabel: NSTextField!

    let webSocket = SwiftWebSocketClient.shared
    override func viewDidLoad() {
        super.viewDidLoad()

        webSocket.subscribeToService { stockValue in
            guard let stockValue = stockValue else {
                return
            }

            DispatchQueue.main.async {
                self.stockValueLabel.stringValue = stockValue
            }
        }
    }
}
Please note that since it's a Mac app, outgoing network connections won't work immediately. Please refer to this section of earlier blog post to understand how to add network capabilities to Mac and enable outgoing network connections
Running client and server
Now that all parts of our infrastructure are ready, we will run server and client simultaneously.
Open the Xcode project, choose SwiftWebSocketServer target and run to run the server. To verify the server is successfully running on a given port, run the following command in the terminal and it should show the TCP server running on that port,

sudo lsof -i :8080
Now run our client by selecting SwiftWebSocketClient target which will immediately start listening on the port 8080 after startup. As you can also see, it updates the values in real-time as the server pushes them down,

As both client and server are running now, we can see values changing in the UI as they are being sent and read on the other side.
And that should be all. As the server is periodically sending values, the client is receiving and showing them on UI. This example demonstrates setting up both client and server on iOS using Swift and their interaction.
I hope you liked this article. If you have any feedback or thoughts about it, please let me know on Twitter @jayeshkawli
The full source code for Swift client and server is already on Github
Summary:
This was the last article in the series of articles for WebSockets on iOS. Previously we covered other introductory posts on the topic. To summarize, here is the list of all the articles including this one for future reference,
How to use WebSockets on iOS using Swift
WebSockets on iOS using URLSessionWebSocketTask
Creating WebSocket server on iOS using NWConnection
How to create a native iOS WebSocket client and connect it to the server

