iOS - Creating Programmatic Layout without using Storyboard (Swift/Objective-C)


There are two ways of creating layout on iOS. First, using readymade storyboard provided by Xcode when you create a new project. And second, by manually creating a UIViewController subclass and assigning it to UIWindow object as a rootViewController in AppDelegate class.
However, things have changed since Xcode 11 and later versions. We no longer need to create and assign viewController in AppDelegate file. All the magic of programmatically creating a layout now happens in SceneDelegate.swift/.m file. Let's see how.
Steps for using programmatic layout eliminating the requirement of storyboard file for projects running on Xcode 11 and later
Let's say you've already created a project by going through following lifecycle,
- File -> New
- Select
Project - Choose
Single View App - Enter
Product Name - Press Next and create a project under appropriate directory
Once you open a project, you will see a familiar folder structure as follow,

Please note that the steps I am going to describe next apply to both Swift and Objective-C projects
Since we are going to use programmatic layout, we won't need Main.storyboard file. So let's eliminate it first.
- Right click
Main.storyboardfile ->Delete->Remove Referencesto eliminate it
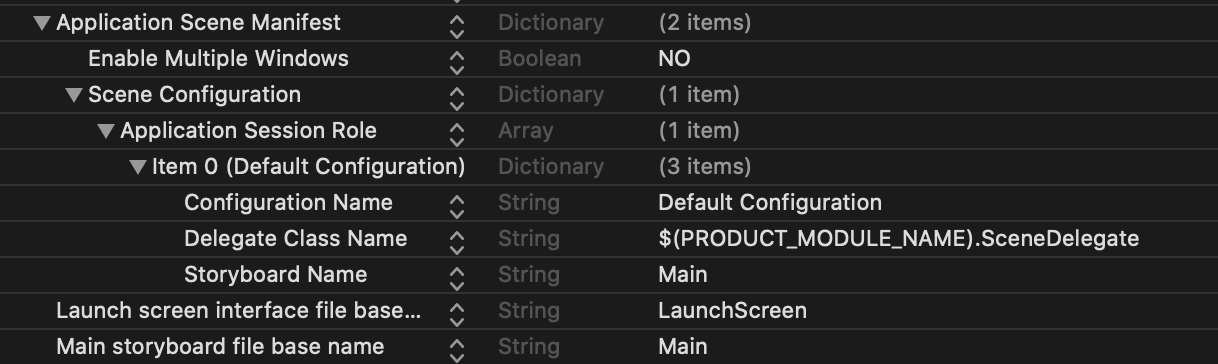
Since we deleted storyboard file, we also need to eliminate its reference from Info.plist file. So next select Info.plist file under your main project structure.
Here we will delete two entries which include Main.storyboard file description. They are both annotated in red rectangle
Storyboard NameunderScene ConfigurationMain Storyboard file base nameentry
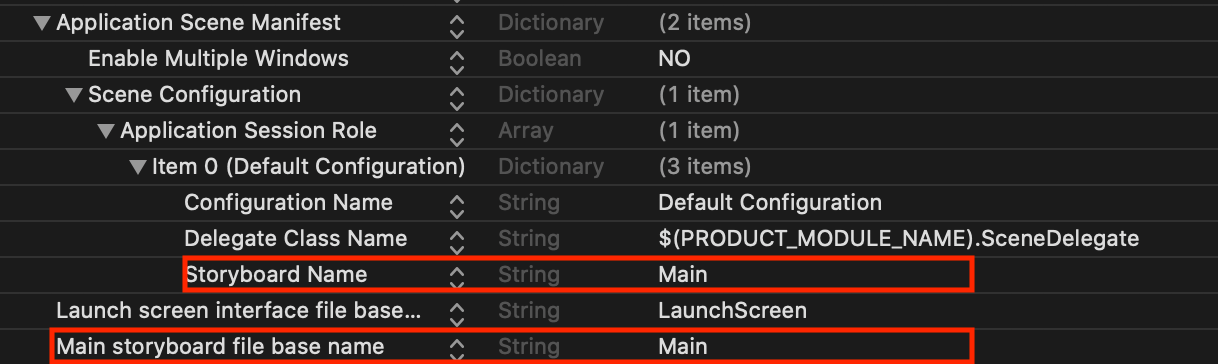
Select both rows and delete them and run the app.
What do you see now? A blank screen?
This is expected because you manually deleted storyboard file, but did not provide a programmatic alternative for displaying view controller. That's why the RootViewController associated with UIWindow object is nil and thus displays a blank screen with no content. Let's fix this problem for both Swift and Objective-C projects.
Swift
With Xcode 11 and up, the UIWindow object is now part of SceneDelegate.swift class and NOT of AppDelegate.swift. So open up the file SceneDelegate.swift and add the following code to existing func scene(_ scene: UIScene, willConnectTo session: UISceneSession, options connectionOptions: UIScene.ConnectionOptions) lifecycle method.
    // SceneDelegate.swift

    guard let scene = (scene as? UIWindowScene) else { return }
    window = UIWindow(windowScene: scene)
    let viewController = ViewController()
    viewController.view.backgroundColor = .red
    window?.rootViewController = viewController
    window?.makeKeyAndVisible()
Objective-C
If you're working on Objective-C project, it follows the similar approach with just a change of syntax. Open up SceneDelegate.m file and add following code to existing - (void)scene:(UIScene *)scene willConnectToSession:(UISceneSession *)session options:(UISceneConnectionOptions *)connectionOptions lifecycle method
    // SceneDelegate.m

    _window = [[UIWindow alloc] initWithWindowScene:(UIWindowScene *)scene];
    ViewController *viewController = [[ViewController alloc] init];
    viewController.view.backgroundColor = [UIColor redColor];
    _window.rootViewController = viewController;
    [_window makeKeyAndVisible];
Summary:
- When app starts, it automatically calls the lifecycle method
willConnectToSessionon startup - Through this method, we have access to internal
UIWindowSceneobject which is utilized to initializeUIWindowobject - We initialize
UIWindowobject by passingUIWindowSceneobject through the initializer - Next we programmatically create the instance of desired
UIViewControllerobject (Please note that this being a programmatic initialization, you have to provide a custom initializer by either passing no parameters or required set of parameters necessary to create a ViewController instance) - We also changed the background color of view controller to be able to verify that we're using the correct
ViewControllerclass - Assign this viewController to
rootViewControllerproperty associated withwindowobject onSceneDelegateclass - Call
makeKeyAndVisibleon window object so that we can show and make this window as a key window
And that's all you need to know to create an app through programmatic means on iOS running on Xcode 11 or above (Irrespective of whether you're using Swift or Objective-C for app development). With just a few lines of code, you can assign anyviewControlleryou would like to act as aRootViewControllerassociated withwindowobject. It's very easy, convenient and avoids the merge conflict hell emerging from multiple teams using the same storyboard file and simultaneously pushing changes

