Sending Push notifications to iOS devices


Have you worked on iOS apps for at least a year? If answer is yes, then you've surely dealt with push notifications. I know it's pain to setup pushes and test them for both Development and Production environments.
Today I will show you two tools you can use to send regular and interactive push notifications.
I have made a GitHub repo with project to handle interactive push notifications. You can check it out here. Any suggestions, comments or pull requests are welcome.
If you are not sure about how to setup push notifications through Apple Developer portal, I strongly advice you to go through Tutorial to setup push notifications for Apple devices before going forward. If you still have any issues, feel free to reach me directly
Pusher
Pusher is an excellent app which can be easily installed on your MAC. You can find details information on it GitHub Page. It also explains how to setup push cert on Apple portal if you haven't already done so.
- Sending regular notifications
This is a regular notification which does not allow user to choose any option or enter any input data. Open a pusher app and enter following payload.
Note : You can get push device token once your device successfully registered for push notifications
Open pusher and type following information :
- Device push token - Push token for device. It is received when app is run on the device
- Certificate associated with registered push service - A development(Sandbox)/Production push cert received from the Apple developer portal
- Payload of the push message to be sent
{"aps":{"alert":"Testing.. (0)","badge":1,"sound":"default"}}
If you have setup push notification handling correctly, you will receive a push with default sound on your device
- Sending interactive notifications
In order to send interactive notifications thereby allowing users to choose among multiple options and/or allow to enter any text in the background, the only thing you will need to change is payload as follows
{"aps":{"alert":"Testing.. (2)","badge":1,"sound":"default", "category" : "ACTIONABLE"}}
That's it. Pusher is convenient in that sense. But there is another command line tool which is more powerful and provides extra features.
Explanation with UI
This is how Pusher UI looks like. there are 3 input fields.
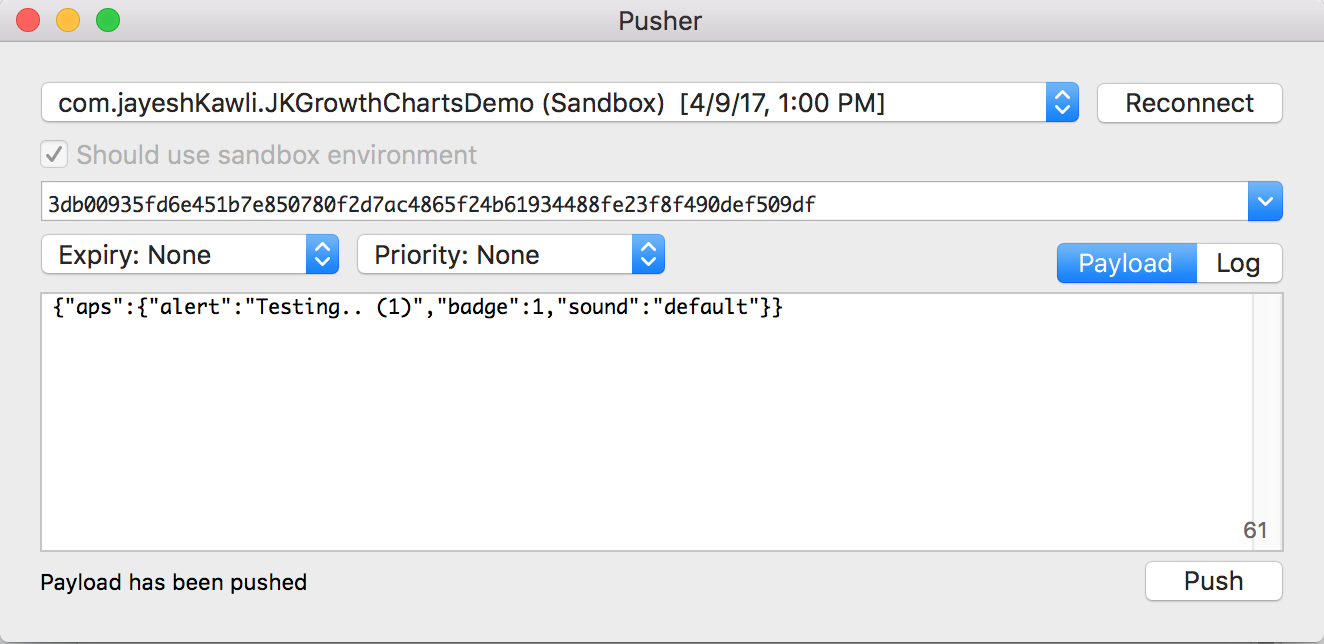
- .pem cert (Converted from .p12)
You can convert .p12 cert into .pem with following commandopenssl pkcs12 -in.p12 -out .pem -nodes -clcerts
-
Push token (Received from Apple developer portal when app setup for push notifications is run on the device)
-
Push Payload - An arbitrary payload sent depending on the device capability. I am using following json as a sample payload.
{"aps":{"alert":"Testing.. (1)","badge":1,"sound":"default"}}
Press the Push button, and you will get a push notification on your device in (a) few moment(s)
Houston
Being a command line fan, Houston has been my number one choice to send over push notifications lately. They have great documentation on the Github Page. For sample I can show you the code I am using to send pushes through command line
Before we begin, make sure you have certificate file with extension .pem downloaded and stored to appropriate path on the machine. Also make sure to grab push token since these are one of those mandatory parameters
- Sending regular push notifications
apn push "[device_push_token]" -c path_to_certificate_pem_file -m "[push_notification_message_title]" -b [badge_number_to_attach_to_app] -d [payload_data_in_the_key_value_form_separated_by_comma]
Everything else will be taken care of by Houston behind curtains.
For example, if I am running Houston command from the same directory I have stored my .pem certificate in, below is an example with dummy parameters for how we can send regular push to registered device.
- Sending regular message
apn push "<push_token>" -c <pem_certificate_file_name>.pem -m "<push_message>"
The push payload received in the app will look like this,
{
    aps =     {
        alert = push_message;
        badge = 1;
        sound = default;
    }
}
* Sending custom data
apn push "<push_token>" -c <pem_certificate_file_name>.pem -m "Push Notification" -d firstName=Jayesh,lastName=KawliThe push payload received in the app will look like this,
{
    {
    aps =     {
        alert = "Push Notification";
    };
    firstName = Jayesh;
    lastName = Kawli;
    }
}
* Sending JSON payload
apn push "<push_token>" -c <pem_certificate_file_name>.pem -m "JSON Push Payload" -P '{"aps":{"alert":"Testing.. (1)","badge":1,"sound":"default"}, "message_id": 100}'The push payload received in the app will look like this,
{
    aps =     {
        alert = "JSON Push Payload";
        badge = 1;
        sound = default;
    };
    "message_id" = 100;
}
I made this recent addition of these examples to this blog after I ran into problem of how to send sample pushes. Hope this will help someone dealing with Push notifications hell
- Sending interactive push notifications
Sending interactive notifications is exactly same as the regular one. The only change is you will have to add extra parameter at the end of previous command
-y "ACTIONABLE"
That should do the magic. Hope you've enjoyed this post. Working with push notifications is pain, but equally fun and educational.
I hope this tutorial was clear enough. If I missed any part or any part is not understandable, shoot me an email. I will be happy to answer any questions you might have

