Using Xcode Test Plans in Xcode 11

Today I am going to write about new testing improvements that Apple introduced as a part of the Xcode 11 Beta 3 release.
As a reference, this post is based off of this session. Here we will see how to create, enable and utilize test plans to write effective tests on iOS platfrom using Xcode
Apple has a nice and long documentation about release notes for Xcode 11 Beta 3. Where they mention in detail about a new feature called as "Test Plan"
Test Plans are a new way to manage which tests run, and how those tests run. Schemes can reference multiple test plans, and define a default test plan for automation. A new Test Plan editor supports defining test configurations, which can inherit shared settings from the plan itself
So how do we add test plans to newly created projects under Xcode 11? Test plans are not created automatically, but rather we have to add them manually after the creation of the project. Let's demonstrate it through the actual example.
Here, I have a project named MyLocalizations. This is a very simple project to demonstrate the usage and power of localizing your app in different languages.
First off, click on the project name in the top pane of the Xcode and select Edit Scheme,

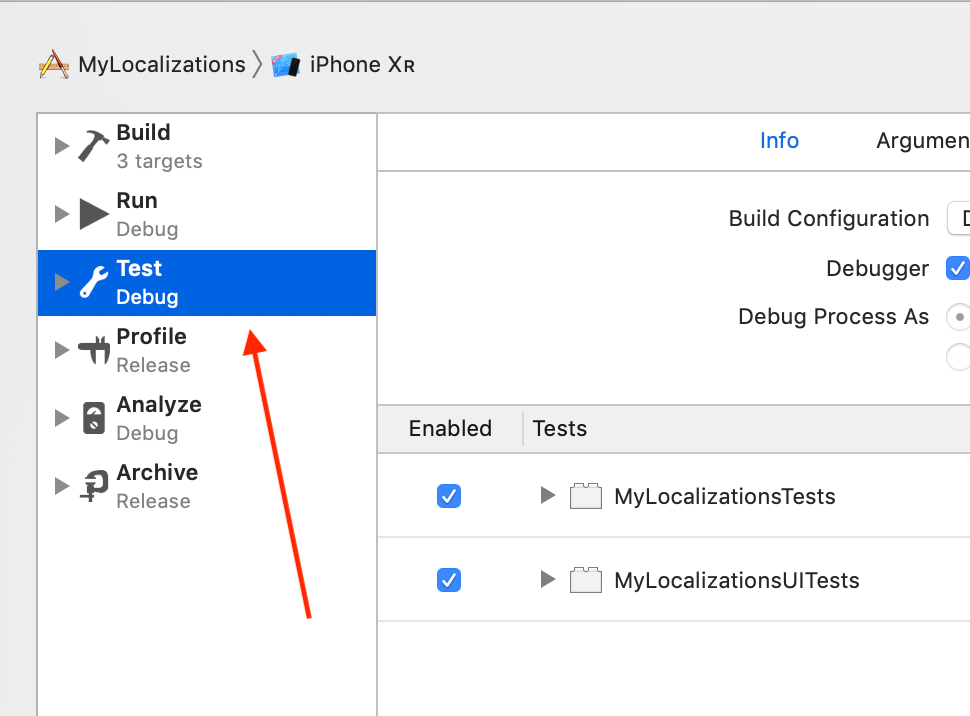
Next, select the Test - Debug option in the left side pane,
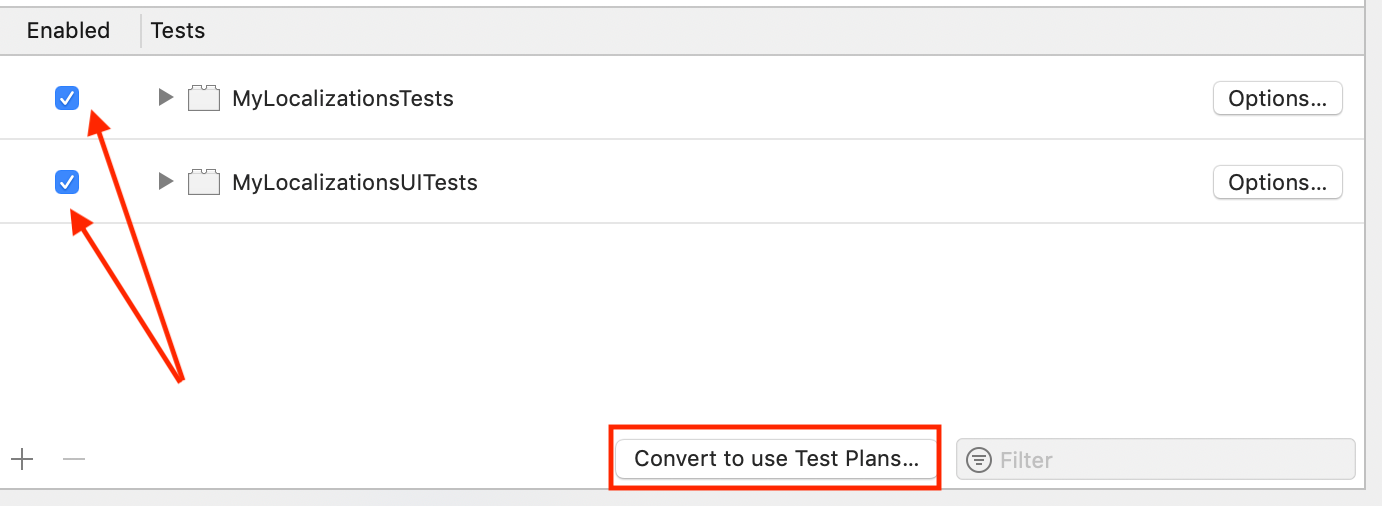
Since we want to convert both unit and UI tests to use test plans, we will select the following option Convert to use Test Plans visible at the bottom of the window. Before you click on it, please make sure you've selected the appropriate option(s) you want to convert to use test plans,
On the next screen, it will ask which scheme of the MyLocalizations project needs to be converted to use Test Plans. If you haven't created any Test Plan before, feel free to choose the (Default) option Create Test Plan from scheme.
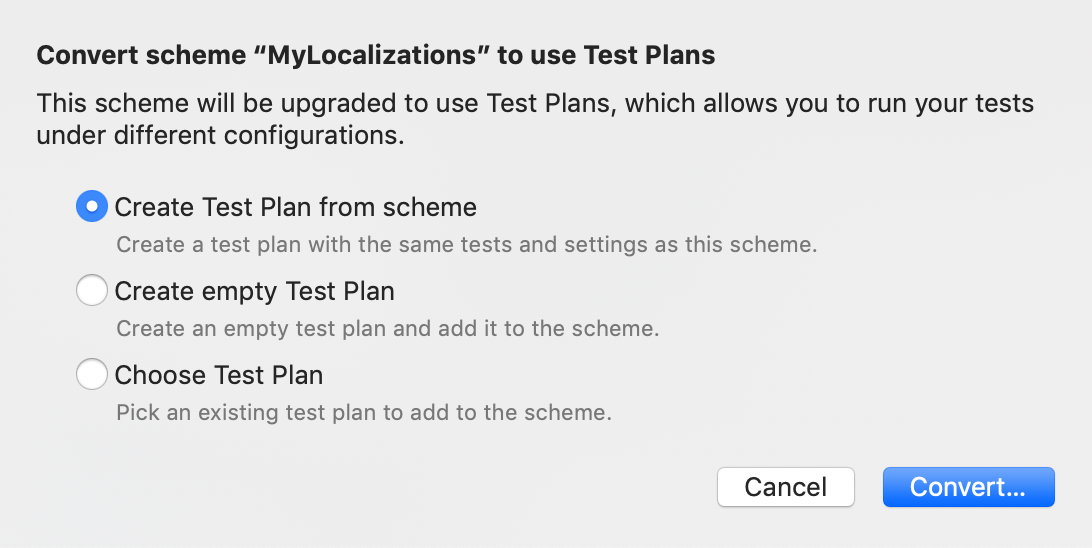
On the other hand, if you already have a Test Plan, choose an option Choose Test Plan to pick an existing Test Plan to add to the scheme. However, in most cases, you are going to select first option since it's pretty straightforward, and if you're integrating Test Plan in the project for the first time, this option makes more sense.
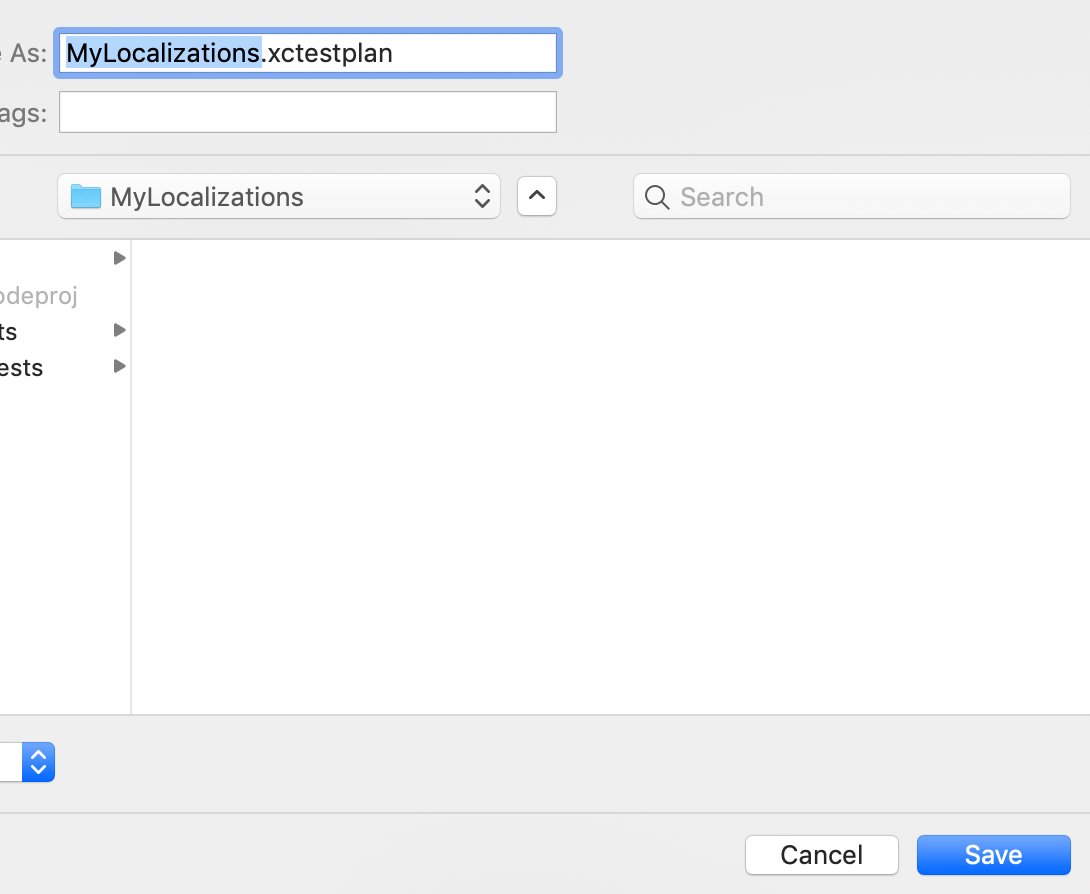
Once the option selection is done, click on the Convert button to create a test plan, select a default option for Test Plan name, click Save button, and then we're all set
Once this is done, you will see MyLocalization Test plan under Test Plans option with two test targets (One for Unit tests and the other for UI tests) and single configuration.
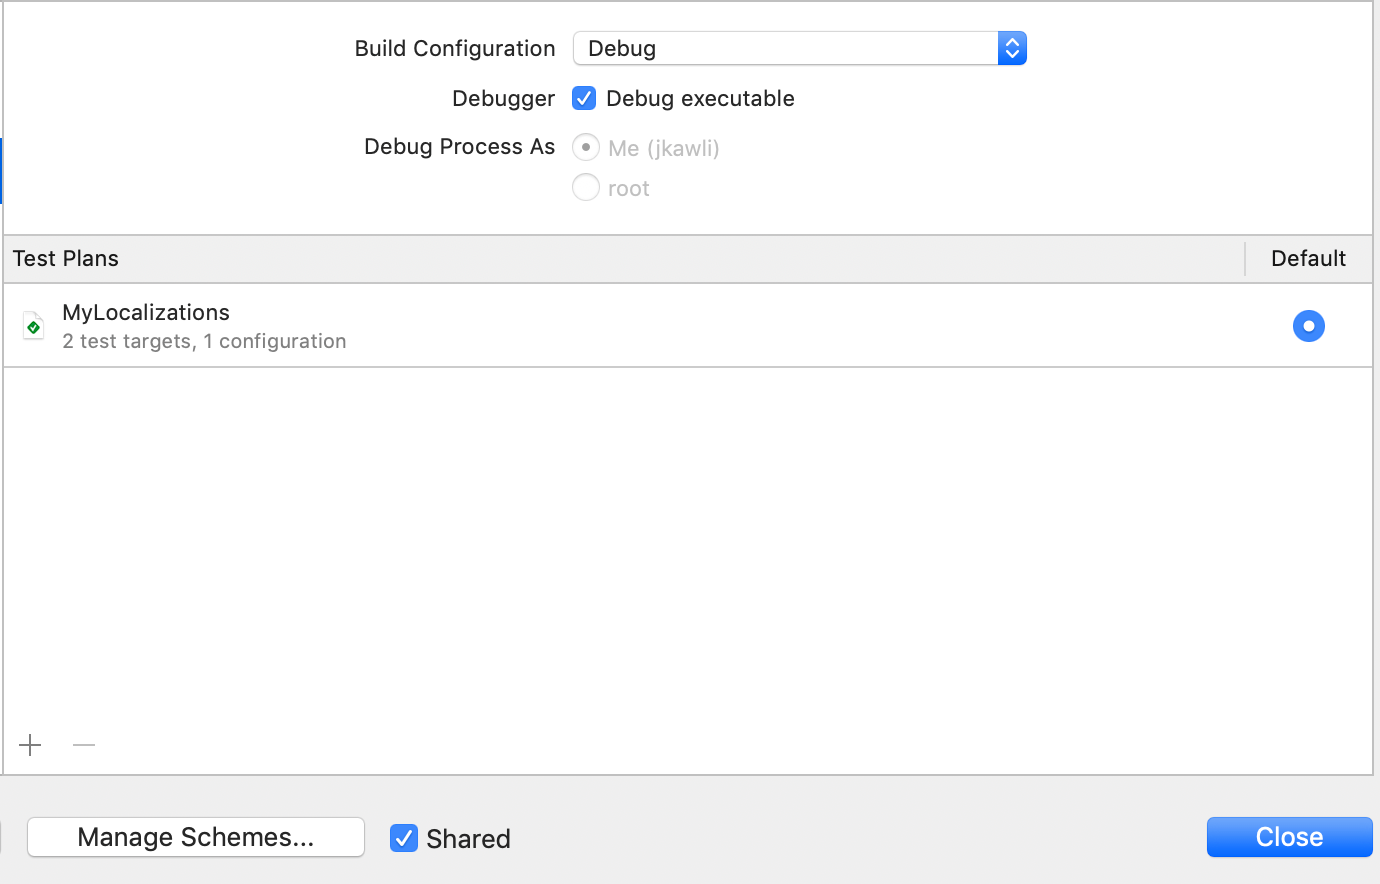
Right now we will see only one default configuration. But don't worry, we will add more, where each configuration will belong to each localization we have in the app. Close the Edit Scheme dialogue and return back to the project.
In this example, we are using MyLocalizations project. Which, as the name suggests supports multiple languages. In this case - English, Spanish, and French. We will create 3 custom configurations under MyLocalizations Test Plan to run and successfully execute our UI tests in all 3 localizations.
Next step, select the MyLocalizations.xctestplan from the left side pan and select the Configurations tab. Here you will find an option to access Shared/Default settings as well as add a new custom settings to match with the localization region this app is run with. Since all 3 settings differ in terms of language, we are going to customize just 2 parameters in custom settings to be able to run UI tests with those languages.
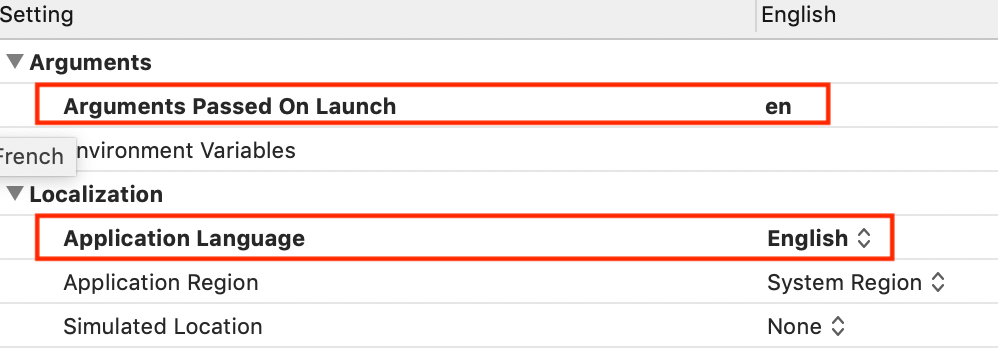
- Arguments Passed On Launch
- Application Language
Below is the full table with a list of custom settings and their values for each of these parameters,
| English | Spanish | French | |
|---|---|---|---|
| System Language | English | Spanish | French |
| Argument passed on launch | en | es | fr |
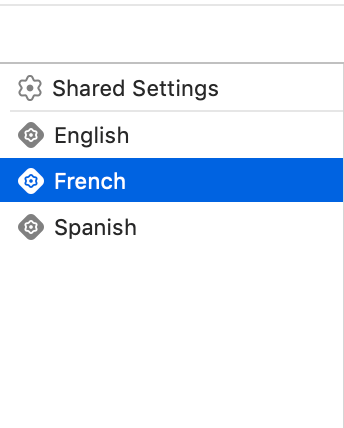
After adding custom settings under Test Plan, our plan will look like this,
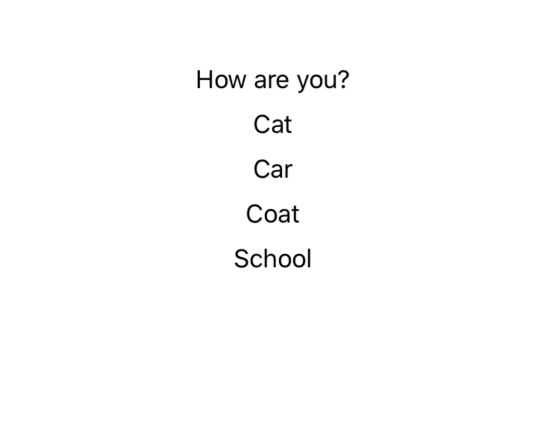
The app we are trying to build is very simple. We will simply display 5 strings on the home page. These strings will be translated for each geo. Assuming we have already added these labels in storyboard, let us start assigning AccessibilityIdentifier to each of them. We will assign these ids to be able to easily write UI tests.
label1.accessibilityIdentifier = "wellness"
label2.accessibilityIdentifier = "petanimal"
label3.accessibilityIdentifier = "vehicle"
label4.accessibilityIdentifier = "clothes"
label5.accessibilityIdentifier = "building"
When the app initializes, we will also assign localized strings to each of these labels,
label1.text = LocalizationUtility.howAreYou
label2.text = LocalizationUtility.cat
label3.text = LocalizationUtility.car
label4.text = LocalizationUtility.coat
label5.text = LocalizationUtility.school
When the app starts, it will look like this for default Geo,
Now let's start writing some UI tests under MyLocalizationsUITests which will be applicable for all 3 localizations. Our simplified UI test which will access these labels and verify the localized version of their text will look like this,
import XCTest
@testable import MyLocalizations

class MyLocalizationsUITests: XCTestCase {

    var app: XCUIApplication!

    override func setUp() {
        continueAfterFailure = false
        app = XCUIApplication()
        app.launch()
    }

    func testHomePage() {
        XCTAssertEqual(app.staticTexts["wellness"].label, localizedString(key: "How are you?"))
        XCTAssertEqual(app.staticTexts["petanimal"].label, localizedString(key: "cat"))
        XCTAssertEqual(app.staticTexts["vehicle"].label, localizedString(key: "car"))
        XCTAssertEqual(app.staticTexts["clothes"].label, localizedString(key: "coat"))
        XCTAssertEqual(app.staticTexts["building"].label, localizedString(key: "school"))
    }

    func localizedString(key:String) -> String {
        let localizationBundle = Bundle(path: Bundle(for: MyLocalizationsUITests.self).path(forResource: CommandLine.arguments[1], ofType: "lproj") ?? "")
        let result = NSLocalizedString(key, bundle:localizationBundle!, comment: "")
        return result
    }
}
Please note the method func localizedString(key:String) -> String which will accept the input string in the form of the parameter and return the localized version. Since localizations added to the source are not accessed from UI tests directly, we will pass the command line argument corresponding to the name of the localization file for that geo, retrieve that file, fetch relevant translation and compare it with the text displayed on the screen.
Since we added 3 custom configurations under test plans if you Option + Click diamond icon in the test, it will show you 3 options to allow you to choose which configuration to run this UI test with.
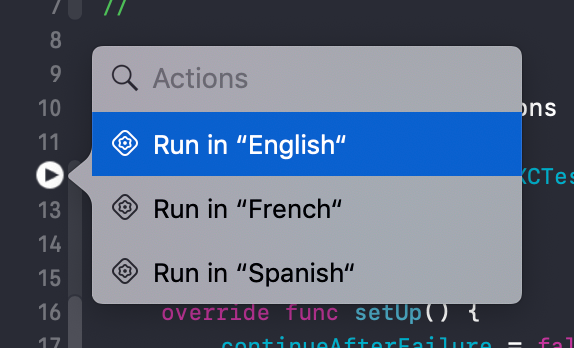
Now you can either choose a specific configuration or just click on the diamond icon to run UI tests with all the available configurations.
One trick to speed up the execution if you have many configurations is to run all those tests in parallel by tweaking the Tests setting under Test Plan and Test tab.

Now, if you click on the diamond icon and run UI tests with all the 3 configurations,

the run will look like this,
It's important to understand that we've just scratched the surface of this new feature and evidently there is a lot to explore here. But this should be a good start to inspire you to get your hands dirty.
Using Test Plans and custom configuration with localization makes more sense with UI tests, but it's not so useful with unit tests. There are several options under configuration sections for example, Runtime Sanitization, Runtime API Checking, and Memory Management - Each of which can be tweaked and customized for each configuration. I chose localizations just to demonstrate the power of Test Plans and how it can be leveraged.
Again, if you haven't watched it yet, please make sure to visit Testing in Xcode - Session 413 from WWDC 2019. I hope you have learned something new from this post. Please do not hesitate to reach out through my Twitter handle if you have follow-up questions.

